
In this blog, I would like to tell you about new cool features that Terraform 1.1 and 1.2 bring. It feels like Terraform has doubled its speed of delivering the new features after they released the 1.0. 🤩
It’s been only a few months since Terraform 1.1 was released with the moved block that empowers the code refactoring.
Now Terraform 1.2 is almost ready (as I am writing this blog in early May 2022) to bring three new efficient controls to the resource lifecycle.
These are three new expressions: precondition, postcondition, and replace_triggered_by.
Terraform Code Refactoring With the Moved Block
Starting from the 1.1 version, Terraform users can use the moved block to describe the changes in resource or module addresses (or resources inside a module) in the form of code.
Once that is described, Terraform performs the movement of the resource within the state during the first apply.
In other words, what this feature gives you, is the ability to document your terraform state mv actions, so you and other project or module users don’t need to perform them manually.
As your code evolves, a resource or module can have several moved blocks associated with it, and Terraform will thoroughly reproduce the whole history of its movement within a state (i.e., renaming).
Let’s review some examples that illustrate how it works.
Move or rename a resource
In a module, I have a bucket policy that has a generic, meaningless name. It is used in a module that creates a CloudFront distribution with an S3 bucket.

An example resource
It’s pretty OK to name a resource like that if you have only a single instance of that kind in your code.
Later, when I need to add another policy to the module, I don’t want to name it “that”. Instead, I want my policies to have meaningful names now.
For example, I could rename the old policy with the terraform state mv command, but other users of my module would not know about that.
That is where the moved block turns out to be helpful!
moved block allows you to document how you rename or move an object in Terraform so that other code users can have the same changes afterward.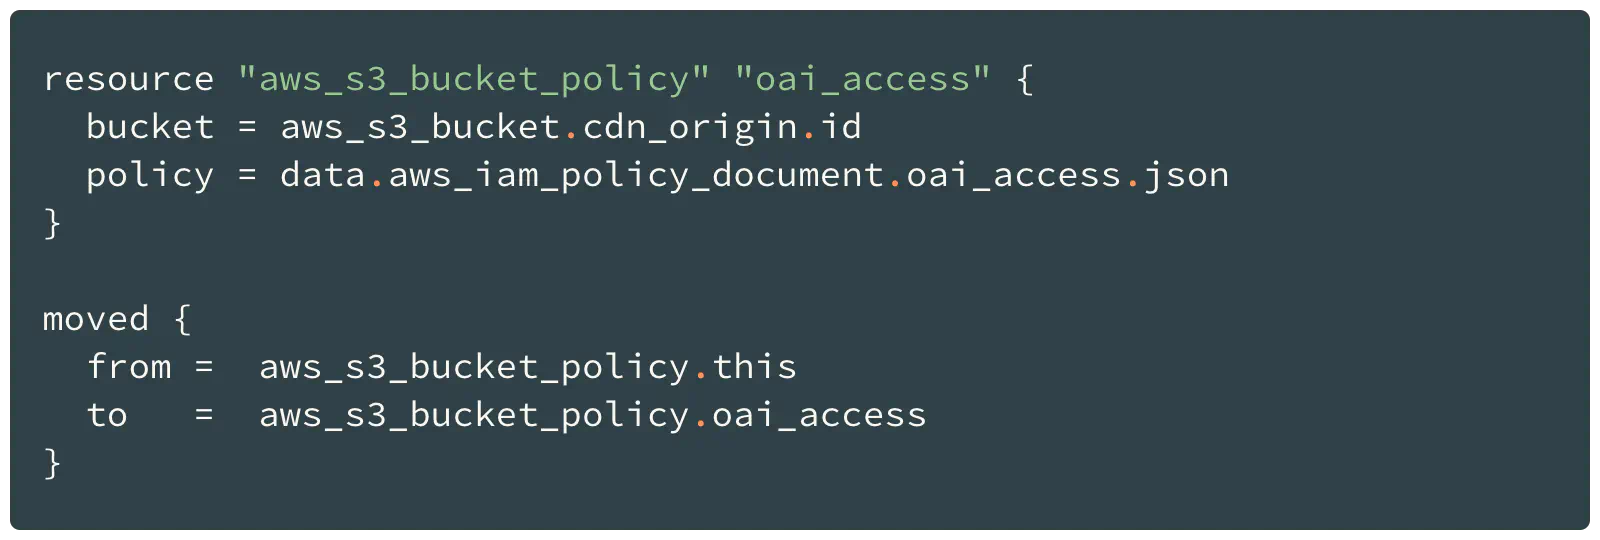
Resource address update with the Moved block
Terraform follows the instructions inside the module block to plan and apply changes. Although the resource address update is not counted as a change in the Plan output, Terraform will perform that update during apply.
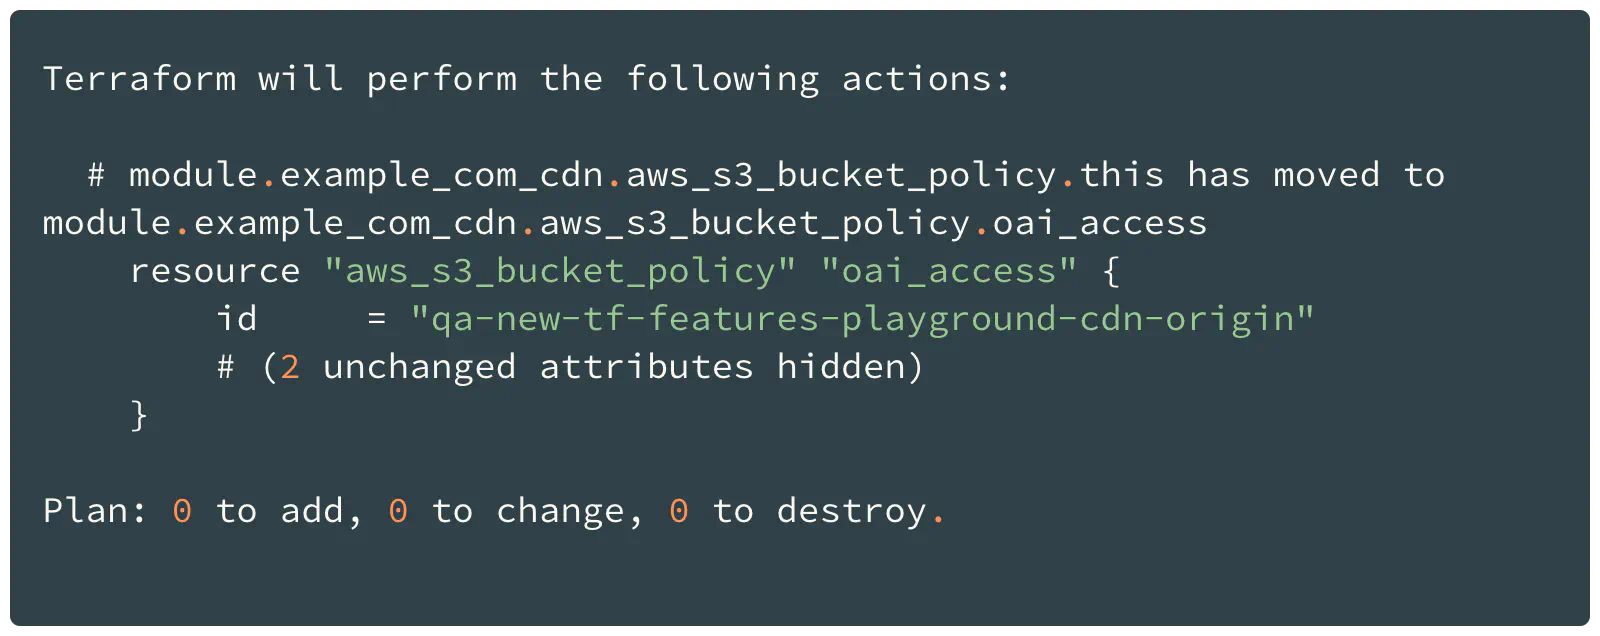
Terraform plan output
Move or rename a module
The same approach can be applied to a module — you can move or rename it as a code too.
Here, I use two modules to create static hosting for a website with a custom TLS certificate.
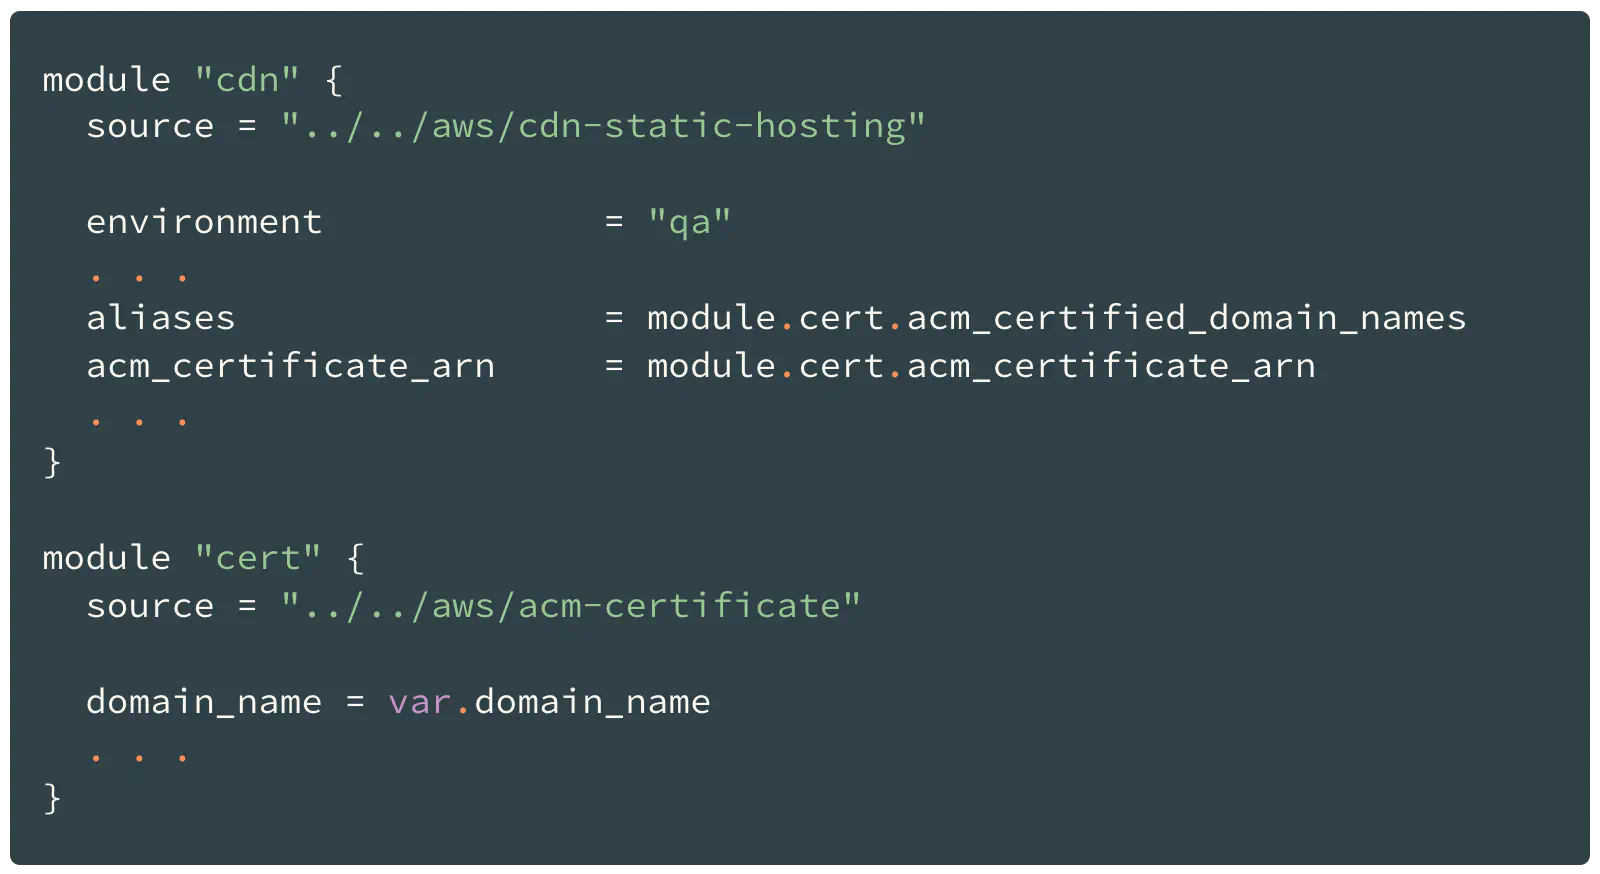
Two modules with generic names
Again, if I need to add another couple of the CDN+Certificate modules, I would like to have meaningful names in my code so clearly distinguish one from another.
Therefore, I would add two moved blocks — one per module call.
And by the way, since I renamed the module (from cert to example_com_cert), I need to update all references to that module’s outputs in the code too.
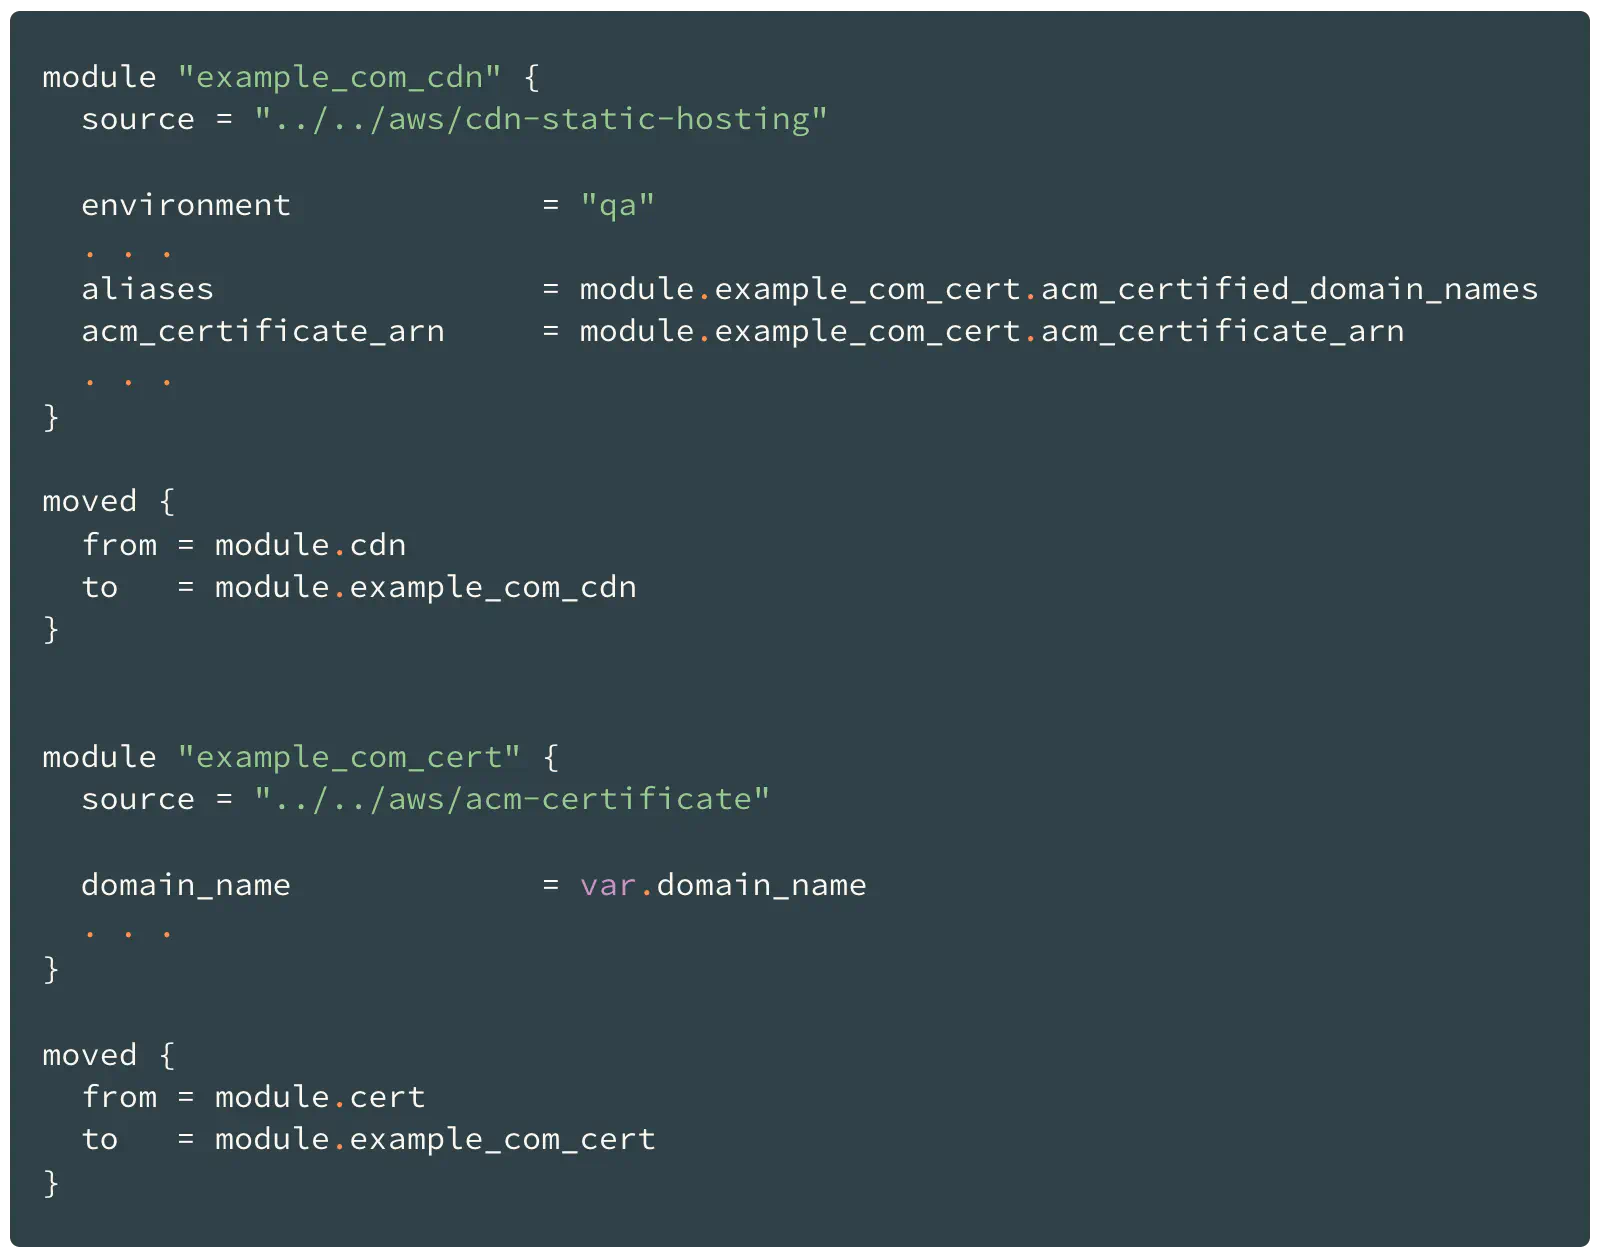
Two modules renamed
However, there is one nuance: when you rename a module and declare that in the moved block, you need to run the terraform init before applying the change because Terraform must initialize the module with the new name first.
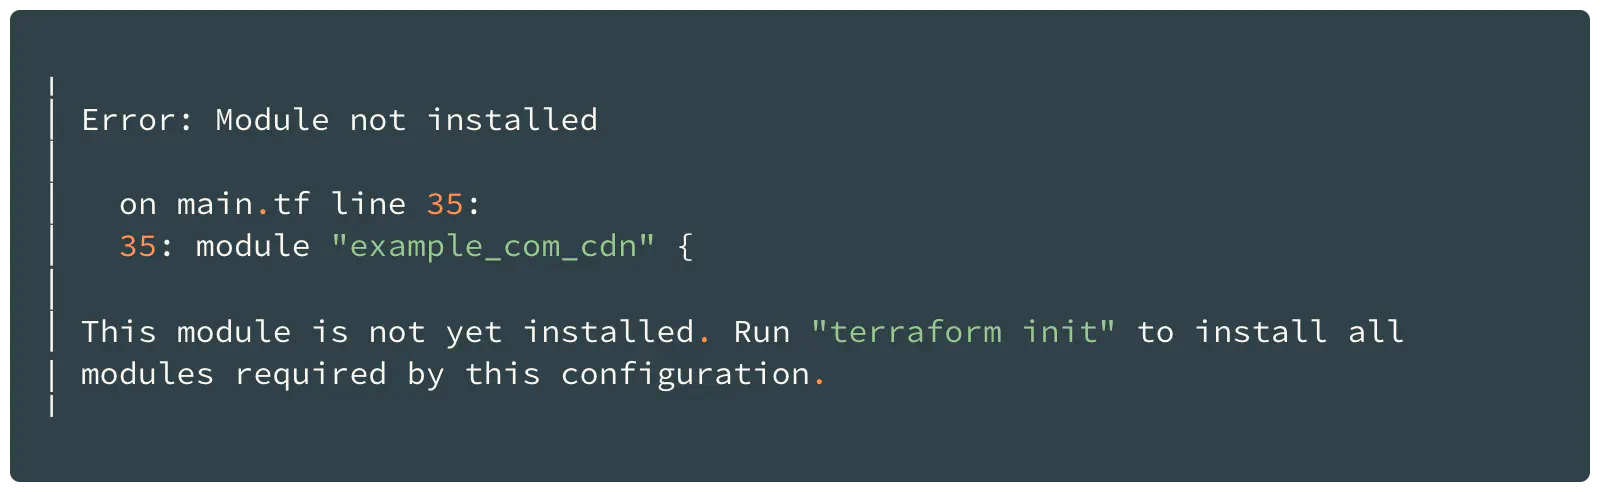
Terraform error: module not installed
There are some more advanced actions you can make with the moved block:
- Implement count and for_each meta-arguments to resources and modules
- Break one module into multiple Check the following detailed guide from HashiCorp that explains how to do that — Refactoring
Introducing the moved blocks into your codebase defacto starts the refactoring process for your module users. But the finale of that refactoring happens when you ultimately remove these blocks.
Therefore, here is some advice on how to manage that:
Keep the
movedblocks in your code for long. For example, when removing amovedblock from the code, Terraform does not treat the new object name as a renaming anymore. Instead, Terraform will plan to delete the resource or module with the old name instead of renaming it.Keep the complete chains of object renaming (sequence of moves). The whole history of object movement ensures that users with different module versions will get a consistent and predictable behavior of the refactoring.
Lifecycle expressions: conditions and replacement trigger
Terraform 1.2 fundamentally improves the lifecycle meta-argument by adding three new configuration options with rich capabilities.
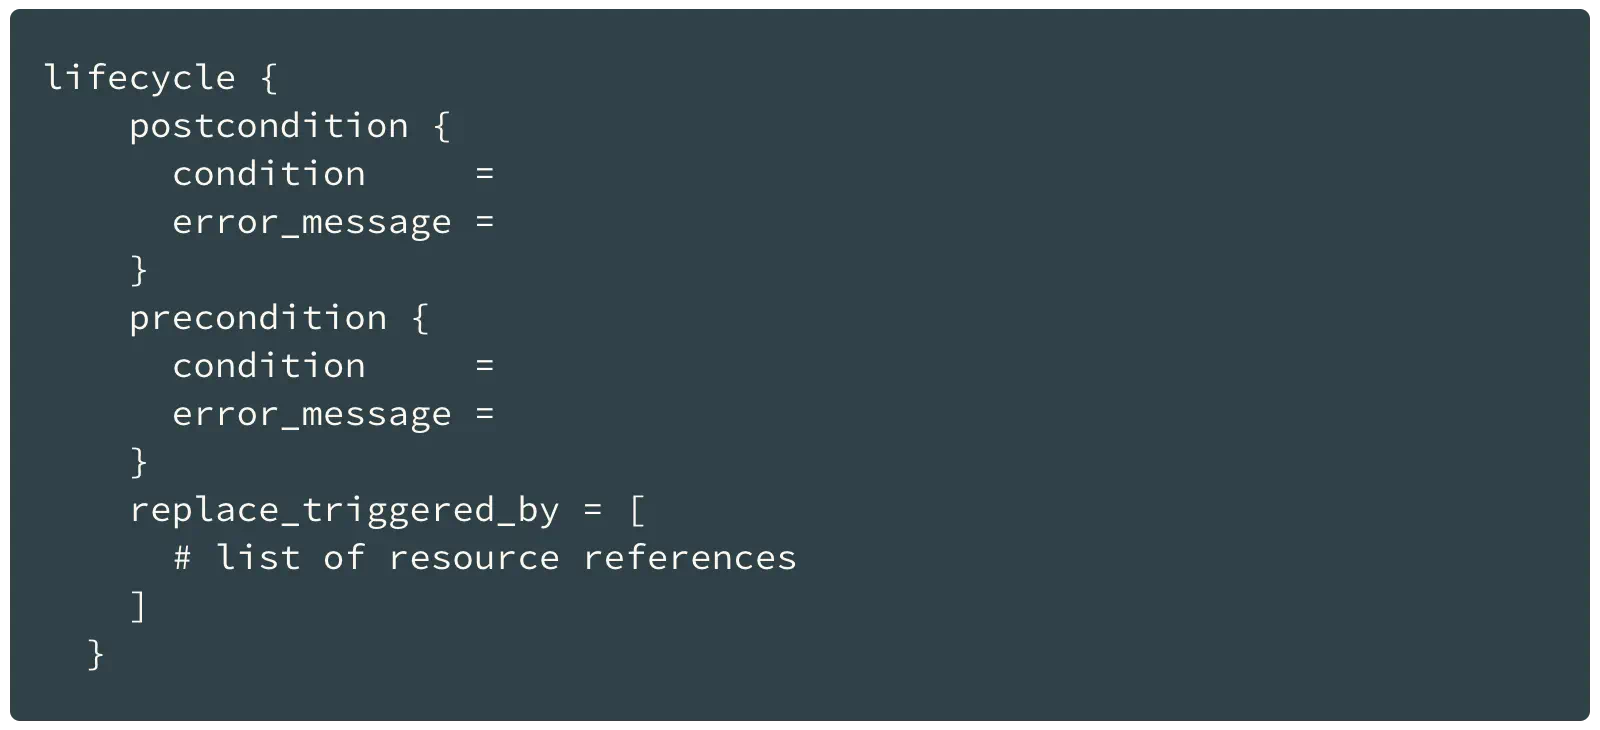
New configuration options for the lifecycle meta-argument
Precondition and Postcondition
When you need to make sure that specific condition is met before or after you create a resource, you can use postcondition and precondition blocks.
The condition here — is some data or information about a resource you need to confirm to apply the code.
Here are a few examples of such conditions:
- Validate some attributes of the Data Source that you cannot check using filters or other available arguments;
- Confirm the Resource argument that can compound several variables (e.g., list);
Precondition works as an expectation or a guess about some external (but within a module) value that a resource depends on.
Postcondition works as the assurance that a resource fulfills a specific condition so other resources may rely on that. If postcondition fails for a resource, this prevents changes to all other resources that depend on it.
Let’s review this new feature with an example of postcondition usage.
Consider the following case: our module receives AMI ID as the input variable, and that AMI should be used in the Launch Template then; we also have the requirement for the EC2 instance created from that Launch Template — its root EBS size must be equal or bigger than 600 GB.
We cannot validate the EBS size using the variable that accepts the AMI ID. But we can write a postcondition for the Data Source that gets the information about the AMI and reference that Data Source in the Launch Template resource afterward.
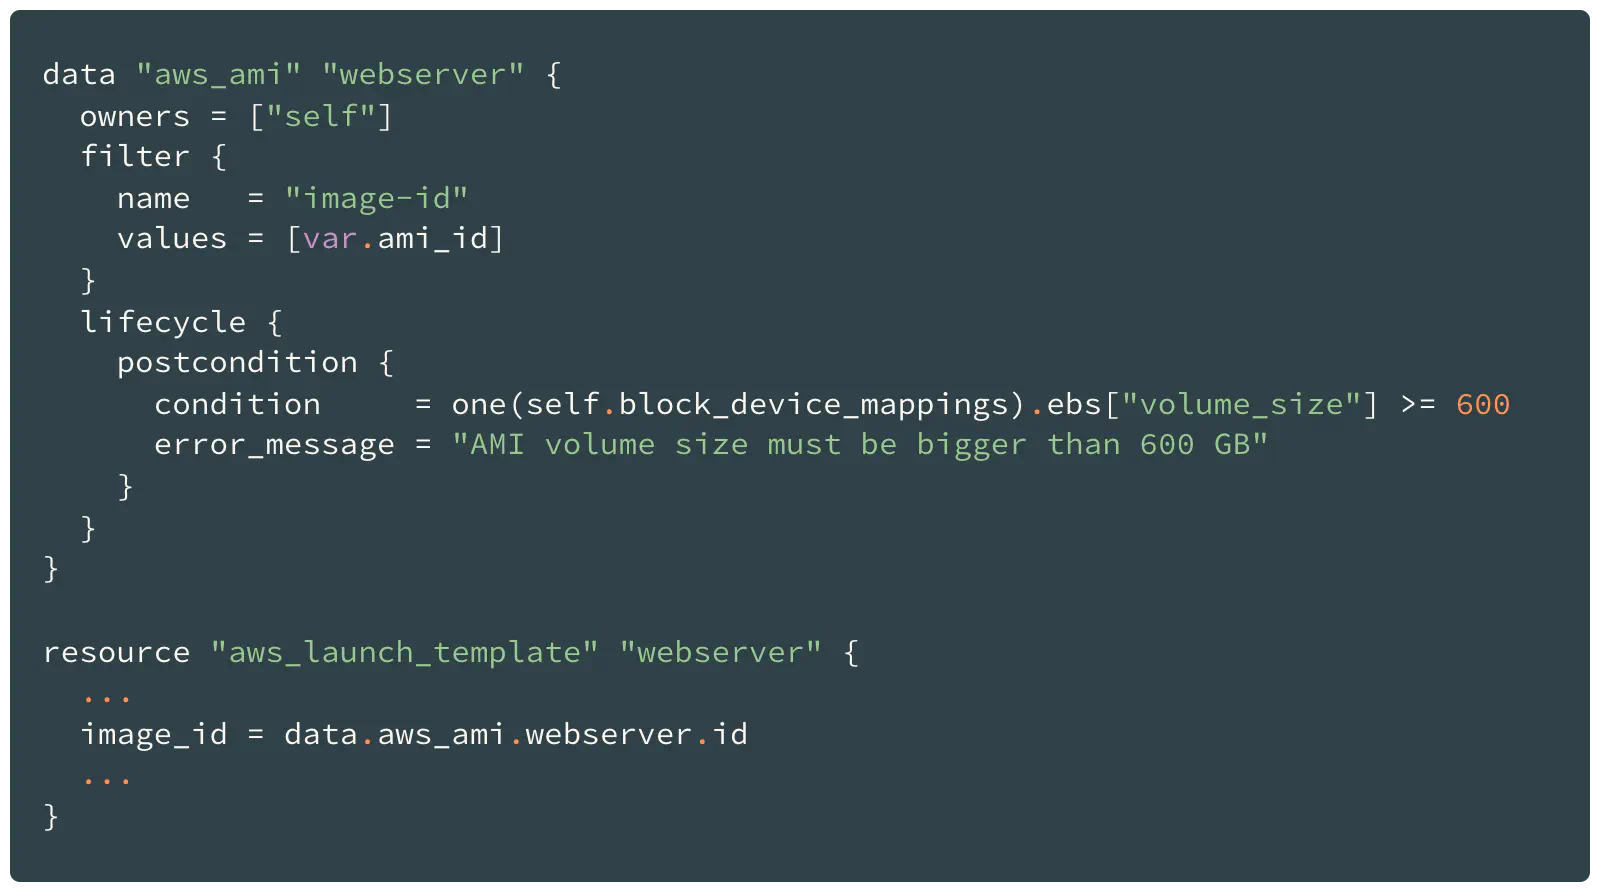
Data Source Postcondition
The condition argument within the block accepts any of Terraform’s built-in functions or language operators.
The special self object is available only for the postcondition block because it assumes that validation can be performed after the object is created and its attributes are known.
Later, if a module user specifies the AMI with an EBS size lesser than 600 GB, Terraform will fail to create the Launch Template because it depends on the Data Source that did not pass the postcondition check.
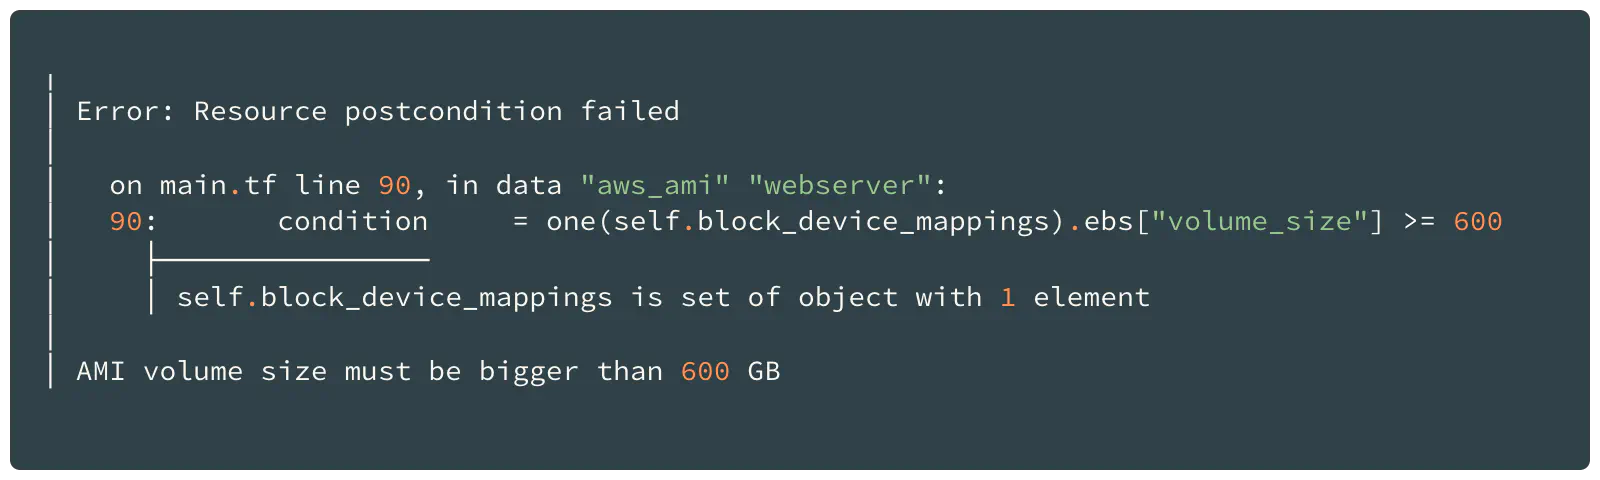
Resource postcondition error
Terraform tries to evaluate the condition expressions as soonest: sometimes Terraform can check the value during the planning phase, but sometimes that can be done only after the resource is created if the value is unknown.
Validate module output with precondition
The precondition block is also available for the module outputs.
Just like the variable validation block assures that module input meets certain expectations, the precondition is intended to ensure that a module produces the valid output.
Here is an example: a module that creates an ACM certificate must prevent the usage of a specific domain name in the certificate’s Common Name or its SANs.
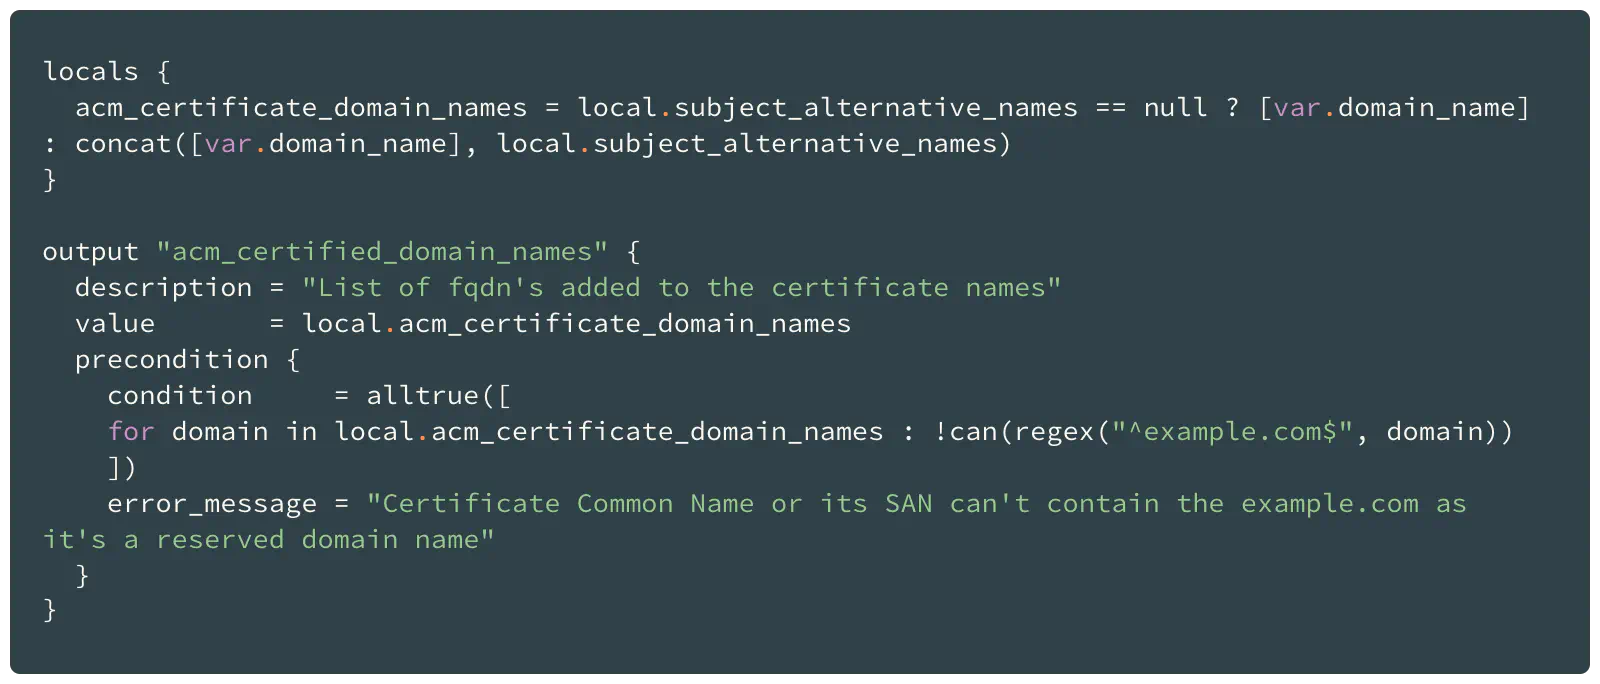
Module output precondition
In this case, instead of validating several input variables, we can write the validation only once for the output.
Trigger resource replacement with replace_triggered_by
Sometimes it’s needed to specify the dependency in the way that recreates a resource when another resource or its attribute changes.
This is useful when two (or more) resources do not have any explicit dependency.
Consider the following case: you have two EC2 instances, A and B, and need to recreate the B instance if the private IP of instance A is changed.
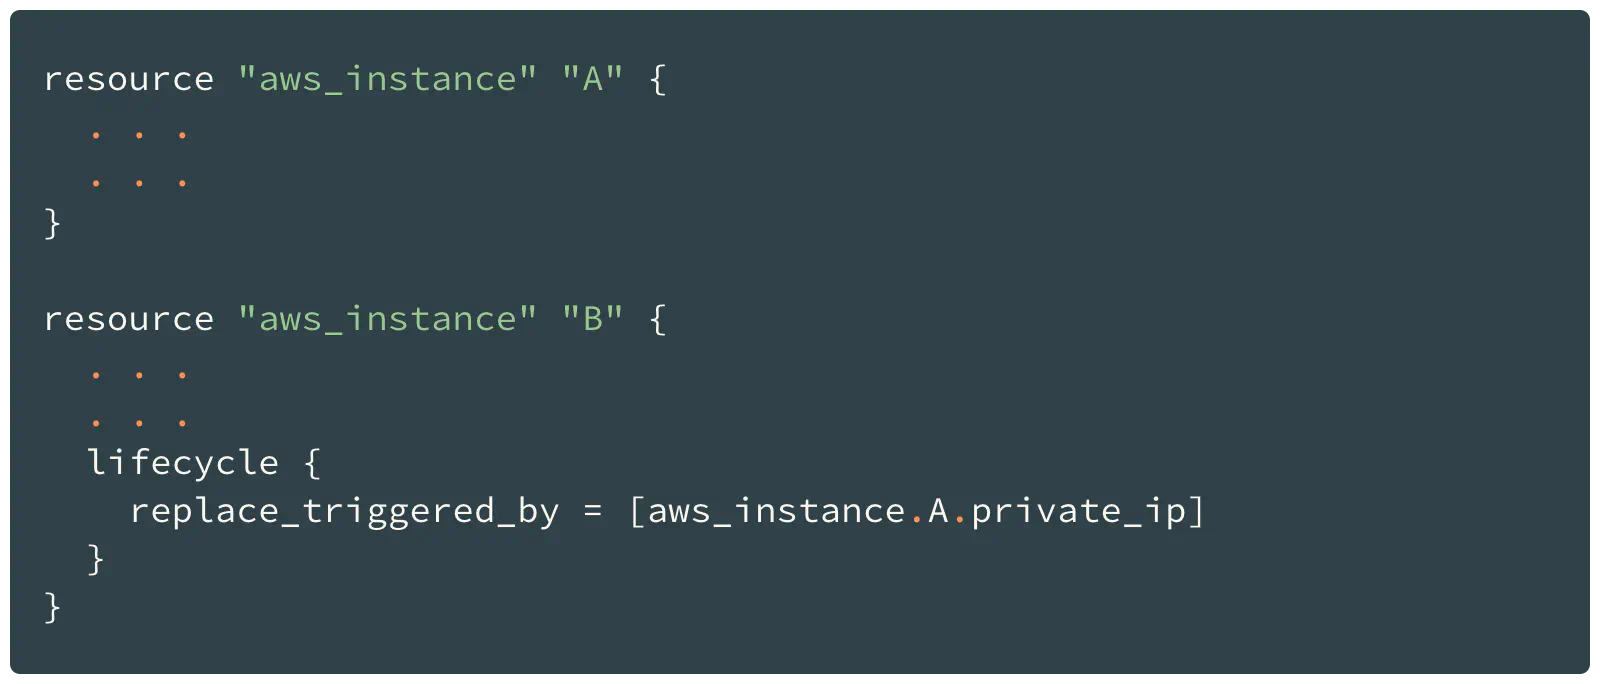
replace_triggered_by example
This is extremely useful when you’re dealing with logical abstractions over the set of resources.
Resource replacement is triggered when:
- any of the resources referenced in
replace_triggered_byare updated - any value is set to the resource attribute that is referenced in
replace_triggered_by
Getting started with Terraform 1.1 and 1.2
If you’re still using older Terraform versions, these new features might be a good motivation for you to upgrade!
Before upgrading, be sure to read the upgrade notes for the specific version at the releases page.
Also, an excellent tool can help with fast switching between different Terraform versions while you’re experimenting — tfswitch.