
I just wanted to compress one image, but went to far…
or “How to add TinyPNG image compression to your macOS Finder contextual menu.”
What is it and how it works
You select needed files or folders, then right-click on them, click on the Services menu item and choose TinyPNG.
After a moment, the new optimized versions of images will appear near to original files.
If you selected a folder along with the files, the script would process all png and jpeg files in it.
Prerequisites
You need to register at TinyPNG and get your API key here — Developer API.
They sometimes block some countries (for example, Ukraine) from registration; in that case, try to use a web-proxy or VPN.
How to create Quick Action Workflow
Open Automator application. If you never used this app before, please read about it on the official user guide website.
On the New Action screen, chose Quick Action
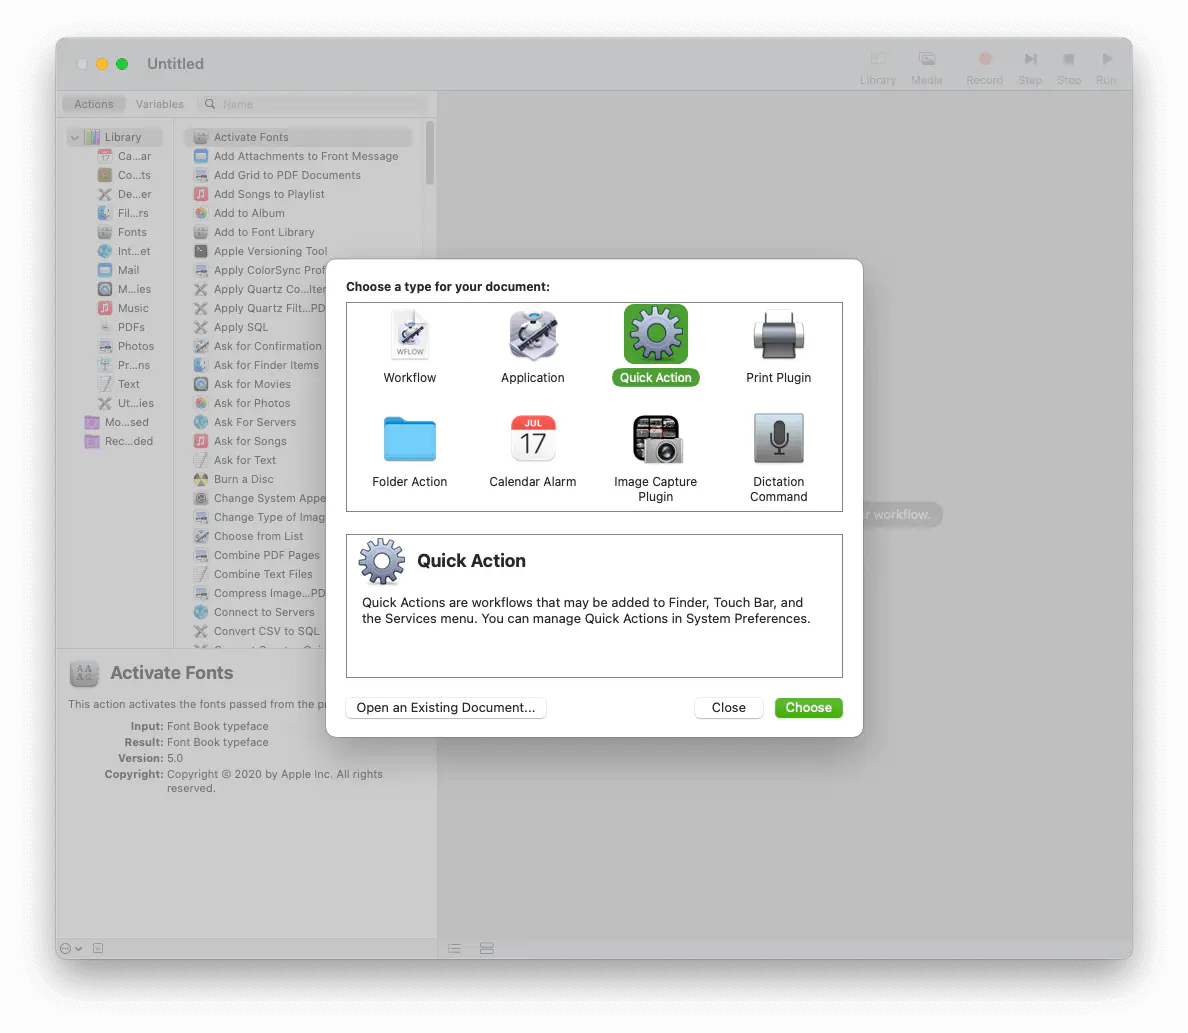
After you click the “Choose” button, you’ll see the workflow configuration window.
Workflow configuration
Find the Run Shell Script action on the Utilities list in Library on the left, and drag it onto the right side of the panel.
Set the following workflow configuration options as described below:
Workflow receives current files and folders in Finder
Shell /bin/zsh
Pass input as arguments
Click the Option button at the bottom of the Action window and Uncheck Show this action when the workflow runs.
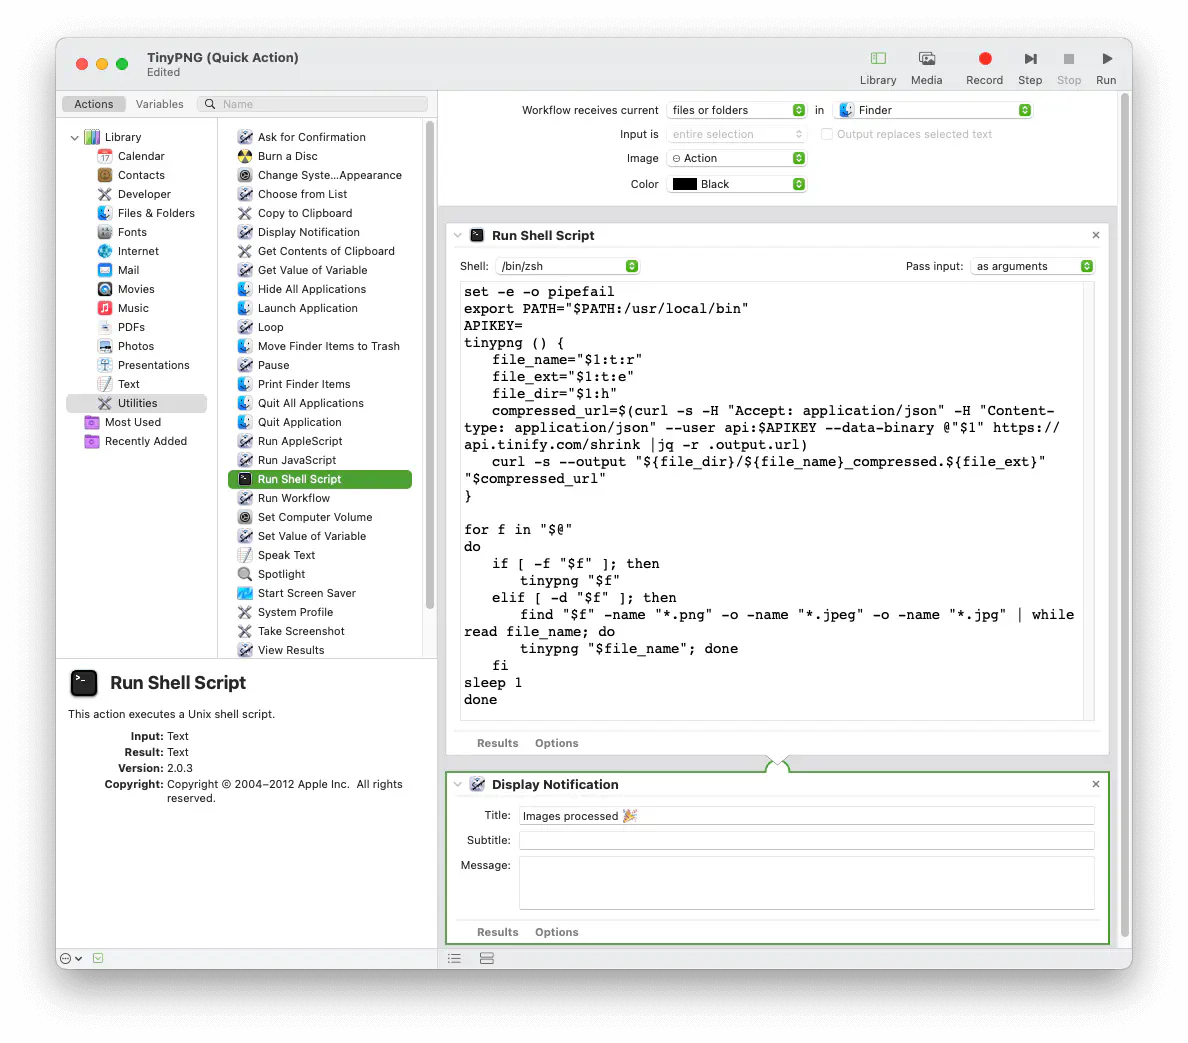
Put the following script into the Run Shell Script window, replacing the YOUR_API_KEY_HERE string with your API key obtained from TinyPNG.
# MacOS Automator Quick Action for image compression using Tinypng.com
# You need to register to obtain a personal API key
# https://tinypng.com/developers
#
# The code below should be put inside "Run Shell Script" Action with the following configuration in the Automator:
# workflow receives current: files or folders | in Finder
# shell: /bin/zsh
# pass input: as arguments

set -e -o pipefail
export PATH="$PATH:/usr/local/bin"
APIKEY=YOUR_API_KEY_HERE
tinypng () {
	file_name="$1:t:r"
	file_ext="$1:t:e"
	file_dir="$1:h"
	compressed_url="$(curl -D - -o /dev/null --user api:$APIKEY --data-binary @"$1" https://api.tinify.com/shrink|grep location|cut -d ' ' -f 2|sed 's/\r//')"
	curl -o "${file_dir}/${file_name}_compressed.${file_ext}" "$compressed_url"
}

for f in "$@"
do
	if [ -f "$f" ]; then
		tinypng "$f"
	elif [ -d "$f" ]; then
		find "$f" -name "*.png" -o -name "*.jpeg" -o -name "*.jpg" | while read file_name; do
		tinypng "$file_name"; done
	fi
done
Utilities used in the script — explained
curl — used to make web requests (like your browser does)
grep — used to parse the response for the needed header (i.e., field) with the file download link
cut — used to extract the URL from the parsed result
sed — used to remove the trailing “carriage return” symbol at the end of extracted string
The response body also contains a JSON object that includes the download URL; you can parse it with jq, for example. But I intentionally refused to use the jq tool because it is not pre-installed in MacOS.
Conclusion
It is simple, and it does its job fine. And you don’t need to install anything to make it work.
To make this a bit fancier, you might also like to add a “Display Notification” (from the Utilities library on the left) after the “Run Shell Script”. The action will display a notification once image processing is completed.
Thank you for reading!